How to Use Midjourney for Beginners — 7 Steps to AI Art Guide
How to use Midjourney for beginners — this complete step-by-step guide covers everything you need to know. Midjourney is the most powerful AI art generator available, creating stunning photorealistic images, fantasy art, and professional graphics from simple text prompts. Learn how to set up Discord, write your first prompt, choose the right plan, and start creating professional AI art today.
If you want to learn how to use Midjourney for beginners, you are in the right place. Midjourney produces some of the most stunning AI-generated images available — far more artistic and detailed than most competing tools. The catch? Midjourney does not have a standalone website — it runs entirely through Discord, which confuses many beginners. This guide removes that confusion completely and walks you through every step from creating a Discord account to generating your first professional AI image.
Unlike most AI image tools, Midjourney does not offer a free plan — it requires a paid subscription starting at $10 per month. However, the image quality it produces is significantly higher than free alternatives, making it worth the investment for creators serious about AI art. For a free alternative, see our guide on how to use Leonardo AI for beginners → For a full comparison of all AI image tools, visit our AI Image Tools directory →
🎨 How to Use Midjourney for Beginners — What It Is
Before diving into how to use Midjourney for beginners step by step, it helps to understand what makes it different from other AI image tools. Midjourney is an AI image generator developed by Midjourney Inc. — it takes text descriptions called “prompts” and converts them into stunning high-quality images in seconds. What separates Midjourney from competitors is its exceptional artistic quality — images have a cinematic, painterly quality that most other AI tools cannot match.
Midjourney operates entirely through Discord — a messaging platform originally designed for gaming communities but now widely used by creators and professionals. You type commands in a Discord channel and Midjourney’s bot responds with generated images. This setup feels unusual at first, but becomes natural within a few uses.
💳 Midjourney Plans — Which One Should Beginners Choose?
Understanding Midjourney’s plans is an important part of learning how to use Midjourney for beginners — because there is no free option. Here is a complete breakdown of all available plans:
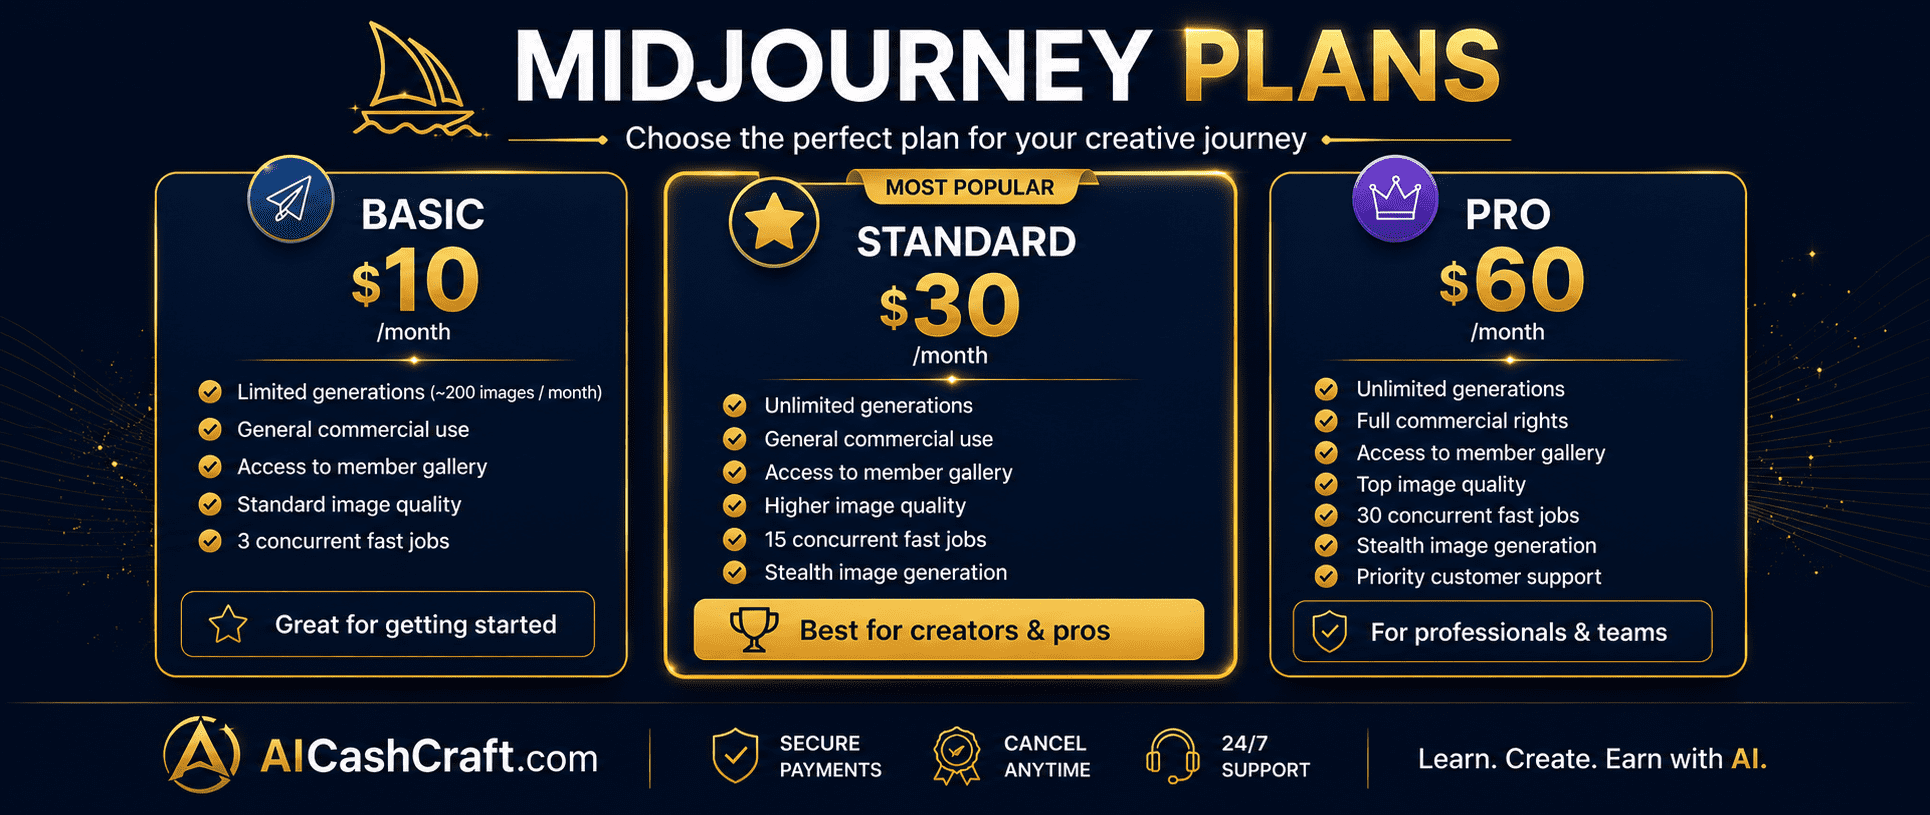
| Plan | Price | Monthly GPU Time | Best For |
|---|---|---|---|
| Basic | $10/month | ~200 images/month | Beginners — testing Midjourney |
| Standard | $30/month | 15 hrs fast GPU (unlimited relaxed) | Regular creators, freelancers |
| Pro | $60/month | 30 hrs fast GPU + Stealth mode | Professional use, client work |
| Mega | $120/month | 60 hrs fast GPU | High-volume professional use |
📝 How to Use Midjourney for Beginners — Complete Setup Guide
Step 1 — Create a Free Discord Account
The first step in learning how to use Midjourney for beginners is setting up Discord. Go to discord.com and create a free account using your email address. Discord is free and takes under 2 minutes to set up. Download the Discord desktop app for the best experience — the browser version works but the app is faster and more reliable for Midjourney use.
Go to discord.com → Sign Up → Enter email and password → Verify your email. Download the Discord desktop app for Windows or Mac for the smoothest Midjourney experience. Mobile app also works for viewing images but desktop is better for prompting.
💡 Use the same email as your Midjourney subscription — this keeps your accounts linked and makes billing management easier.Go to midjourney.com and click “Sign In” — log in with your Discord account. Then click “Subscribe” and choose your plan. The Basic plan at $10/month is the best starting point for beginners learning how to use Midjourney. Enter payment details and confirm your subscription.
💡 Annual billing saves approximately 20% compared to monthly — but start with monthly until you confirm Midjourney fits your workflow.After subscribing, go to midjourney.com and click “Join the Beta” or find the Midjourney Discord server link. Once inside the server, you will see multiple channels in the left sidebar. Look for channels named “newbies” or “general” — these are where beginners generate images. Alternatively, you can add the Midjourney bot to your own private Discord server for a cleaner experience.
For beginners, the clearest way to use Midjourney is in your own private Discord server — away from the busy public newbie channels. Create a new Discord server (free), then go to the Midjourney website and add the Midjourney bot to your server. This gives you a clean private space to generate and organize your images without distraction from other users.
💡 This is the recommended setup for how to use Midjourney for beginners — your own server keeps your generated images organized and easy to find in the chat history.🖼️ How to Use Midjourney for Beginners — Generate Your First Image
Now that your Discord and Midjourney are connected, here is how to use Midjourney for beginners to generate your first image. The process uses a simple command called /imagine:
In your Discord channel, type /imagine and press Space. A “prompt” field will appear. Type your image description in this field. For your first image, try: a glowing laptop on a dark navy desk, golden hour lighting, minimalist professional photography style, ultra detailed — then press Enter to generate.
Midjourney processes your prompt and shows a progress bar in the Discord channel. After 30–60 seconds, 4 image variations appear in a grid. The images are labeled U1, U2, U3, U4 (Upscale) and V1, V2, V3, V4 (Variation) below each image. Click U1–U4 to upscale and download any of the 4 images at full resolution.
💡 U = Upscale (download this image at full size). V = Variation (generate 4 more images similar to this one). Always upscale your best result before downloading.After clicking Upscale on your chosen image, the full-resolution version appears in the channel. Click the image to open it full size, then right-click and choose “Save Image As” to download it to your computer. All your generated images are also saved automatically in your Midjourney gallery at midjourney.com/app — accessible anytime from any device.
✍️ How to Use Midjourney for Beginners — Writing Better Prompts
Prompt writing is the most important skill when learning how to use Midjourney for beginners. The quality and specificity of your prompt directly determines the quality of your results. Here is the exact formula that consistently produces professional results:
Weak vs Strong Midjourney Prompts
These prompts give Midjourney very little direction. Results will be generic and inconsistent — not the stunning professional images Midjourney is capable of producing. Vague prompts waste your monthly GPU time.
This prompt specifies the subject, time of day, lighting style, camera angle, atmosphere, quality level, aspect ratio, and Midjourney version. The result will be dramatically more professional and usable than a vague one-word prompt.
Essential Midjourney Parameters for Beginners
- –ar 16:9 — Sets aspect ratio (16:9 for YouTube/blog, 1:1 for Instagram, 9:16 for Stories)
- –v 6 — Uses Midjourney Version 6 — the latest and most capable model
- –style raw — Reduces Midjourney’s artistic interpretation for more literal, photorealistic results
- –q 2 — Higher quality rendering (uses more GPU time per image)
- –no text, watermark — Tells Midjourney to avoid text overlays and watermarks in the image
- –chaos 20 — Adds variation between the 4 generated images (0=similar, 100=very different)
💡 How to Use Midjourney for Beginners — 7 Tips for Better Results
Midjourney Version 6 is the most capable model available and should be your default for all image generation. It understands complex prompts better, produces more accurate results, and handles realistic details far more effectively than older versions. Add –v 6 to the end of every prompt until it becomes automatic.
The /describe command is one of the most powerful learning tools for beginners. Upload any image you admire and Midjourney will generate 4 text prompts that would produce similar results. This is the fastest way to understand how professional Midjourney prompts are structured — and immediately start producing images at that quality level.
On Standard plan and above, switch to Relaxed mode by typing /relax for unlimited image generation (with slower processing times). Use Fast mode only for urgent work or when speed matters. This dramatically extends how far your monthly GPU hours go — most creators use Relaxed mode for 80% of their generations.
💡 Basic plan users do not have Relaxed mode — this is the main reason to upgrade to Standard once you are generating images regularly.When one of your 4 generated images is almost perfect but not quite right, click the V button below it to generate 4 more images that are similar but slightly different. This is far more efficient than rewriting your prompt from scratch — it keeps the elements you like while exploring small variations. Use Vary (Subtle) for minor changes and Vary (Strong) for larger differences.
Midjourney accepts images as part of your prompt — paste an image URL before your text prompt and Midjourney will use that image as a visual reference for style, composition, or color palette. This is extremely useful for maintaining consistent visual style across a project, matching a client’s existing brand aesthetic, or recreating a specific artistic style you admire.
Go to midjourney.com/showcase to browse thousands of community images — and click any image to see the exact prompt used to create it. This is the most efficient way to discover effective prompting techniques and styles. Find an image you love, copy its prompt structure, and adapt it for your own work.
After upscaling an image you like, Midjourney offers Zoom Out (1.5x or 2x) and Pan (left, right, up, down) buttons. Zoom Out expands the canvas beyond the original image boundary — useful for creating wider landscape images or extending portrait images to full scenes. Pan moves the camera in a direction to extend the image naturally. These tools are unique to Midjourney and dramatically expand your creative options.
💰 5 Ways to Make Money With Midjourney for Beginners
Once you understand how to use Midjourney for beginners, the next step is monetizing your skills. Midjourney’s image quality is high enough to command real income — here are the most practical methods:
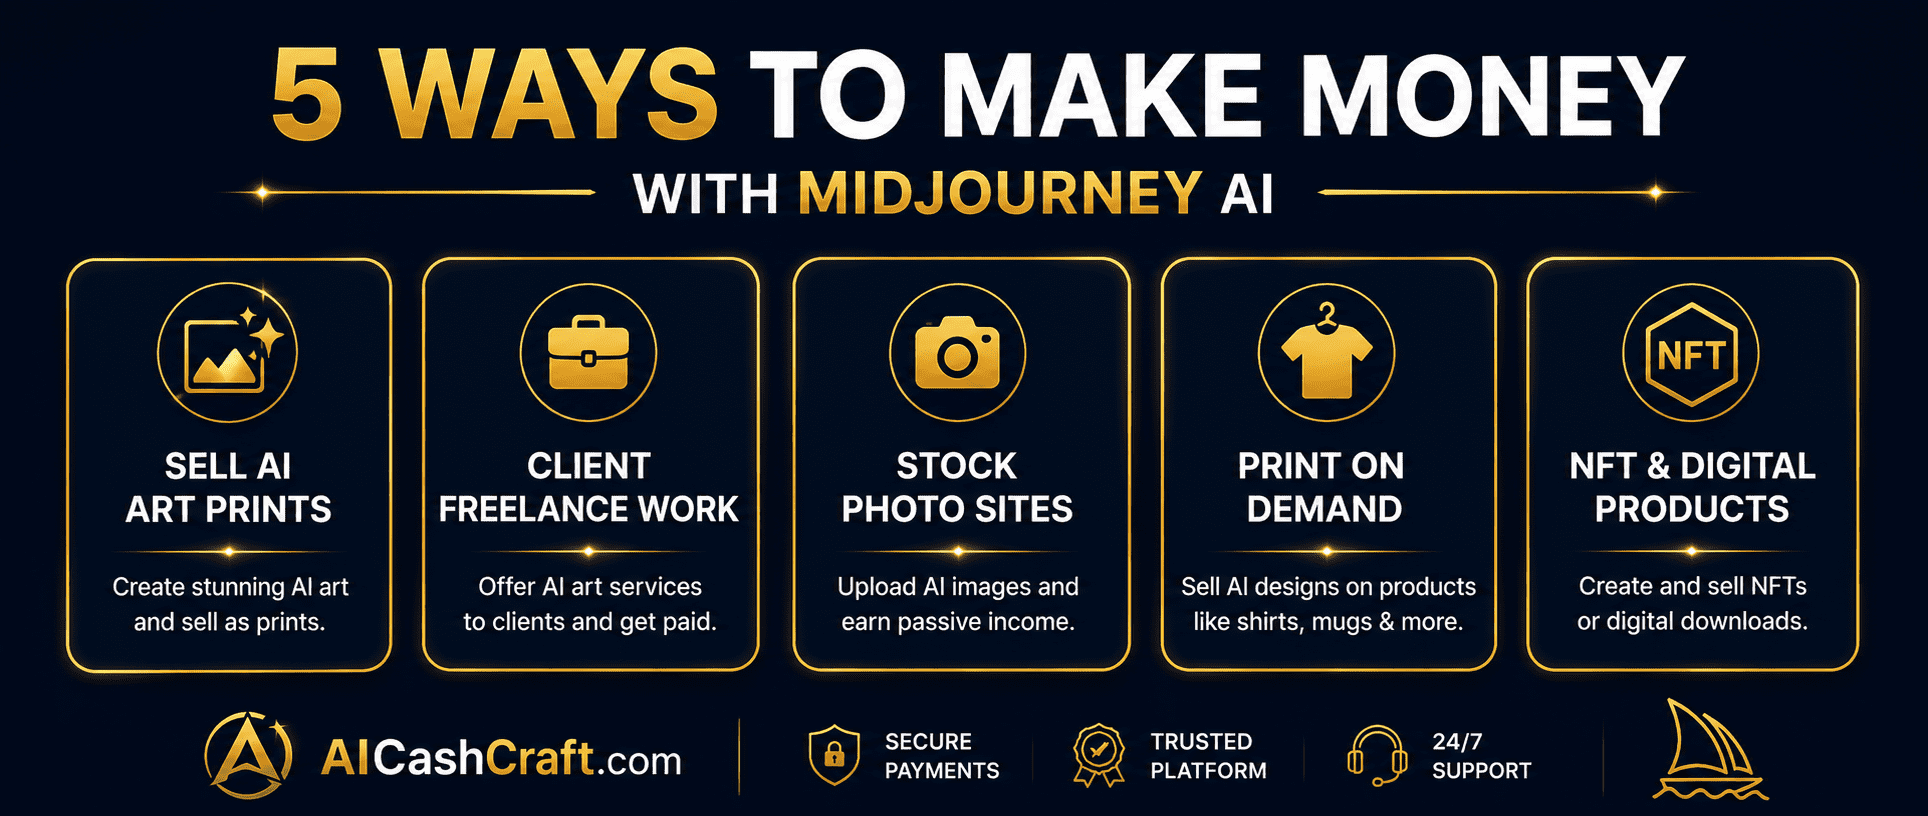
Midjourney’s cinematic, artistic image quality makes it ideal for creating wall art prints, digital art collections, and illustrated prints to sell on Etsy as instant digital downloads. Create themed art collections — botanical, minimalist, fantasy, architecture — and list them at $5–25 per pack. Each listing sells repeatedly with no printing, inventory, or shipping required. See our complete guide on how to make money on Etsy with AI →
💡 Niche art collections sell 3–5x faster than generic prints — focus on specific aesthetics like “dark academia wall art” or “japandi minimalist prints” rather than broad categories.Businesses, bloggers, YouTubers, and content creators regularly need high-quality custom images for websites, social media, presentations, and marketing materials. Midjourney’s quality level is high enough to charge premium freelance rates — $25–100 per project for a set of custom images. List your service on Fiverr or Upwork with a clear portfolio of your best Midjourney work. See how to get started in our Start Freelancing With AI guide →
Several stock photo platforms now accept AI-generated images — Adobe Stock, Shutterstock, and Pond5 among others. Upload your best Midjourney images, add relevant keywords, and earn royalties every time someone licenses an image. This is a passive income stream that compounds over time as your portfolio grows. Always check each platform’s current AI image policy before submitting — policies are evolving rapidly.
💡 Focus on commercial-friendly subjects — business concepts, technology, nature, food, and lifestyle — as these categories have the highest download volumes on stock platforms.Use Midjourney’s high-resolution output to create designs for t-shirts, hoodies, mugs, tote bags, phone cases, and wall art sold through print-on-demand platforms like Printful, Printify, or Redbubble. These platforms handle all printing, packaging, and shipping automatically — your only job is creating the designs and listing them in your store. Midjourney’s artistic quality stands out significantly in print-on-demand markets compared to simpler AI-generated designs.
Self-published authors on Amazon KDP regularly need professional book covers — and Midjourney produces exactly the high-quality, cinematic imagery that sells books. Offer book cover design services at $30–150 per cover, or create illustration packs for children’s books, fantasy novels, and romance titles to sell as templates. Midjourney’s ability to generate consistent character styles (with some practice) makes it particularly useful for book illustration work.
💡 Book cover design is one of the most consistently in-demand AI image services — KDP authors publish new books continuously and need new covers regularly, creating repeat client opportunities.📊 Midjourney vs Leonardo AI — Which Should Beginners Choose?
A common question when learning how to use Midjourney for beginners is how it compares to Leonardo AI — the most popular free alternative. Here is a clear comparison:
| Feature | Midjourney | Leonardo AI |
|---|---|---|
| Free Plan | ❌ No free plan | ✅ 150 free credits/day |
| Starting Price | $10/month | Free (paid from $12/month) |
| Image Quality | ★★★★★ Exceptional | ★★★★☆ Very Good |
| Interface | Discord-based | Web browser — easier |
| Art Style | Cinematic, artistic, stunning | Versatile — all styles |
| Best For | Art, concept art, premium visuals | Beginners, daily content |
| Commercial Use | ✅ Paid plans | Check terms per plan |
❓ Frequently Asked Questions — Midjourney for Beginners
Midjourney does not currently offer a free plan — a paid subscription starting at $10/month is required. A limited free trial was previously available and may return in future, but as of now all usage requires a subscription. For a free alternative with similar capabilities, see our guide on how to use Leonardo AI for beginners →
No coding knowledge is required to use Midjourney. The only technical requirement is setting up a free Discord account and knowing how to type the /imagine command followed by your image description. Everything else — image generation, upscaling, downloading — happens through simple button clicks in Discord.
Start with the Basic plan at $10/month — it provides approximately 200 images per month, which is more than enough for beginners learning how to use Midjourney. Upgrade to Standard ($30/month) only when you consistently run out of Basic plan credits. The Standard plan adds unlimited Relaxed mode generation, which is the biggest practical upgrade.
Yes — paid Midjourney subscribers receive commercial use rights for their generated images. Always review Midjourney’s current Terms of Service at midjourney.com for the latest details, as policies can update. Pro plan users also get Stealth Mode, which keeps generated images private and off the public gallery — useful for client work and proprietary projects.
In Fast mode, Midjourney generates 4 image variations in approximately 30–60 seconds. In Relaxed mode (Standard plan and above), generation takes 1–5 minutes depending on server load. Upscaling an individual image takes an additional 15–30 seconds. Speed is not Midjourney’s strength compared to some competitors — but the image quality justifies the extra wait time for most creators.
Use Midjourney Version 6 (–v 6) — it is the most capable and versatile model currently available. Add –v 6 to the end of every prompt. Version 6 produces more accurate, photorealistic, and detailed results than older versions and handles complex multi-element prompts significantly better. It is the default recommendation for all beginners learning how to use Midjourney.
📚 Related Guides
🎯 Final Thoughts — How to Use Midjourney for Beginners
Now you know exactly how to use Midjourney for beginners — from setting up Discord and choosing the right plan to generating your first image, writing better prompts, and monetizing your skills. Midjourney is the most powerful AI art generator available, and its image quality justifies the subscription cost for anyone serious about AI creative work.
The learning curve is steeper than free web-based tools like Leonardo AI — but the results are significantly more artistic and professional. Start with the Basic plan, use Version 6 for all generations, add aspect ratio parameters from day one, and browse the Community Showcase to discover effective prompting techniques from experienced creators.
For more free AI tool guides and income strategies, explore the AICashCraft Blog. Follow our YouTube channel and Instagram for free video guides and daily AI tips.
Get the latest AI tool guides, free tools, and income strategies from AICashCraft — completely free.
Top 10 Free AI Tools for Beginners
Download our free 13-page PDF guide covering the best free AI tools with beginner tips and step-by-step advice. No sign-up needed.
⬇️ Download Free PDF Guide